A simmer sits between 185°F and 205°F (85°C–96°C). That’s the short answer. The liquid should show small, gentle bubbles breaking the surface every second or two — not the rolling, aggressive churn of a full boil.
Sounds simple, but here’s where most home cooks get tripped up: stoves don’t display temperatures. They display numbers or flame sizes, and those vary wildly from one kitchen to the next. So knowing the simmer temp in degrees only gets you halfway there. The other half is learning what a simmer actually looks like in your pot and how to dial it in on your specific stove.
What Temperature Is a Simmer?
The simmering temperature range of 185°F to 205°F exists just below water’s boiling point of 212°F (100°C) at sea level. That gap of roughly 7 to 27 degrees might sound small, but it makes a real difference in how food cooks.
Within that range, cooks generally recognize three levels:
Bare simmer (185°F–190°F): You’ll see a bubble or two lazily float to the surface every few seconds. There’s minimal movement in the pot. This is the go-to for delicate tasks like poaching fish, gently cooking custards, or keeping a finished soup warm without overcooking anything in it.
Gentle simmer (190°F–200°F): Small bubbles break the surface steadily, roughly one per second. The liquid has a slight shimmer and gentle movement. This is the workhorse simmer — the one most recipes mean when they simply say “simmer.” Think chili, braised meats, tomato sauce, and most soups.
Rapid simmer (200°F–205°F): Bubbles come up frequently and the surface is noticeably active, but it still hasn’t crossed into a full rolling boil. You’ll see more steam and more agitation. This is useful when you want to reduce a sauce relatively quickly without the harshness of a full boil, which can break emulsions or scorch dairy.
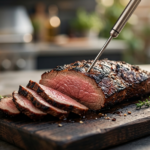
If you want to verify your simmer temp with precision, an instant-read thermometer works perfectly. Just clip it to the side of the pot or dip it into the liquid, making sure the probe isn’t touching the bottom of the pot where it’ll read hotter. If you’re not sure how to get accurate readings, learning how to read a meat thermometer properly translates directly to checking liquid temperatures too.
What Does Simmer Mean in Cooking — Beyond the Numbers?
Most of the time, you won’t be standing over your pot with a thermometer. You’ll be reading the surface of the liquid with your eyes. So what does simmer mean in cooking when you’re just looking at a pot?
Here’s what to watch for:
At a proper simmer, the surface of the liquid should look alive but calm. Small bubbles rise from the bottom and pop at the surface in a steady, relaxed rhythm. There’s a gentle shimmer across the top of the liquid, and you’ll see wisps of steam — but not the heavy, billowing clouds you get from a boil.
If the surface is completely still with no bubbles at all, you’re below simmering temperature. The food is warming, not simmering. If the surface is churning with large bubbles that break aggressively and continuously, you’ve crossed into a boil.
One detail that’s easy to overlook: the size of your pot and the amount of liquid inside it affect what a simmer looks like. A wide, shallow pan with a thin layer of broth will show more surface activity at the same temperature than a tall, narrow pot filled to the brim. So don’t panic if your wide skillet looks a little more active than you expected. Trust the bubble rhythm more than the overall drama.
Simmer vs Boil Temperature — Why Those Few Degrees Matter
The difference between a simmer and a boil is roughly 7 to 27 degrees Fahrenheit. On paper, that’s nothing. In a pot, it’s everything.
A full boil hits 212°F (100°C) at sea level. At that temperature, water converts to steam rapidly, bubbles are large and violent, and the liquid churns aggressively. That kind of energy is great for cooking pasta quickly or blanching vegetables. It’s terrible for most other things.
Here’s why that temperature gap matters practically:
Proteins tighten and toughen. Drop a piece of chicken into a rolling boil and the muscle fibers seize up, squeezing out moisture. Simmer it gently and the proteins coagulate slowly, staying tender. This is the same principle behind why pulled pork internal temp targets are reached through low, patient heat rather than blasting the meat at high temperatures.
Starches break down differently. A vigorous boil can cause potatoes and root vegetables to crumble on the outside before the center is cooked through. A simmer cooks them evenly from edge to center.
Dairy and emulsions break. Boil a cream sauce and the fat separates. Boil a hollandaise and it curdles. A gentle simmer keeps those delicate mixtures stable.
Flavors develop more cleanly. Long, slow simmering allows collagen in tough cuts of meat to convert to gelatin, building body and richness in broths and braises. A hard boil extracts flavors too aggressively and can make stocks cloudy and bitter.
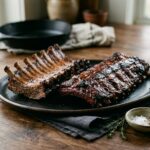
This is also why the question of should you boil ribs comes up so often — boiling tough cuts tends to make them rubbery, while a gentle simmer breaks down connective tissue without destroying the meat’s texture.
Finding the Right Stove Simmer Setting
This is where things get frustrating, because there’s no universal “simmer” button. The stove simmer setting depends on your stove type, your burner size, your pot, and even how full the pot is.
On a gas stove, you have more visual control because you can see the flame. For a gentle simmer, you typically want the flame low enough that it barely licks the bottom of the pot — usually the lowest setting or just a hair above it. If the flame is wrapping up the sides of the pot, you’re too high.
On an electric coil or smooth-top stove, the dial usually runs from 1 to 10 (or Low to High). A simmer generally falls somewhere between 2 and 4, but this varies enormously between brands. Some electric stoves run hot even on their lowest setting, while others barely maintain a simmer at 3. You’ll need to learn your stove’s personality.
On an induction cooktop, you often have more precise control, and many models have a dedicated simmer function or allow you to set specific wattage levels. Induction responds to changes almost instantly, which makes it easier to dial in than electric coil.
The most reliable method across all stove types is the bring-to-boil-then-reduce approach. Start on medium-high heat until you see the first signs of a boil — a few large bubbles, active steam. Then immediately turn the heat down to low or medium-low. Wait a minute or two for the boil to settle, then adjust up or down in small increments until you see that steady, gentle bubble rhythm.
A few practical notes that make a bigger difference than people realize:
Lid on vs. lid off. Putting a lid on the pot traps heat and raises the internal temperature. A pot that simmers perfectly with the lid off will often creep up to a boil once you cover it. If your recipe calls for a covered simmer, you’ll likely need a lower stove setting than you’d use uncovered.
Pot material matters. Thin aluminum and stainless steel pots heat up fast and respond quickly to burner changes. Heavy cast iron and enameled Dutch ovens hold heat stubbornly — once they’re hot, they stay hot, and turning the dial down won’t produce an immediate change. With heavy pots, reduce the heat earlier than you think you need to and be patient.
Burner size matters. A small pot on a large burner will receive more heat than the same pot on a small burner, even at the same dial setting. Match your pot to your burner whenever possible.
Common Simmering Mistakes (and How to Fix Them)
“My lowest setting still boils.” This is one of the most common complaints, especially with electric stoves. If your stove simply runs too hot on its lowest setting, try moving the pot partially off the burner so only half of it sits over the heat. You can also use a heat diffuser — a flat metal disc that sits between the burner and the pot and spreads the heat more evenly at a lower intensity. They cost a few dollars and solve this problem completely.
Walking away too soon. Simmering isn’t a set-and-forget situation, at least not in the first five to ten minutes. The liquid temperature continues to climb even after you turn the heat down, especially in heavy pots. Stay nearby, watch the surface, and make small adjustments until the simmer stabilizes. Once it’s holding steady, then you can step away for longer stretches.
Too much evaporation. If your liquid level is dropping faster than the recipe suggests, your simmer is probably too aggressive. Lower the heat slightly and consider partially covering the pot with a lid tilted at an angle. This lets some steam escape while slowing evaporation.
Simmering too low. The opposite problem happens too. If you crank the heat down so far that the bubbles stop entirely, you’ve dropped below simmering temperature. The food is just sitting in hot liquid, which means longer cook times and potentially uneven cooking. You want to see at least a few bubbles breaking the surface.
Not adjusting for altitude. Water boils at a lower temperature at higher elevations — roughly 1°F lower for every 500 feet above sea level. If you live in Denver (about 5,280 feet), water boils around 202°F instead of 212°F. That means your simmering temperature shifts down too, and your simmer and boil are much closer together. You’ll need to watch the pot more carefully because the visual difference between a simmer and a boil narrows at altitude.
Frequently Asked Questions
What number is simmer on an electric stove?
On most electric stoves with a 1–10 dial, a gentle simmer falls between 2 and 4. However, this varies significantly by brand and model. The best approach is to bring the liquid to a boil first, then reduce the dial to the lower end of that range and adjust based on what you see in the pot.
Is simmer low or medium heat?
Simmering usually starts at medium heat to bring the liquid up to temperature, then drops to low or medium-low to maintain it. If you try to reach a simmer on low heat from a cold start, you’ll be waiting a very long time. Think of it as a two-step process: medium to get there, low to stay there.
Can you simmer too low?
Yes. If the liquid isn’t producing any bubbles at all, the temperature has dropped below the simmering range and you’re essentially just holding the food in hot liquid. This extends cook times and can lead to uneven results, especially with starchy foods and tough cuts of meat. Aim for at least a bubble or two every few seconds.
Does a simmer look different in different liquids?
Slightly. A thick, starchy liquid like a tomato sauce or gravy will show fewer visible bubbles than a thin broth at the same temperature because the viscosity traps the steam. Don’t assume a thick sauce isn’t simmering just because the surface looks relatively calm. Look for gentle movement around the edges and occasional bubbles pushing through the center.
The real skill with simmering isn’t memorizing a number — it’s learning to read your pot. Once you know what those small, steady bubbles look like and how your stove responds to dial changes, you’ll stop second-guessing recipes and start trusting your eyes. Start with the bring-to-boil-then-reduce method, give yourself a few minutes to fine-tune the heat, and resist the urge to crank it up when things seem slow. Patience at the burner is what separates a good braise from a tough, dry one.