Most people who overcook their steak or serve dry chicken breast aren’t bad cooks. They just don’t know how to read a meat thermometer properly — or they skip using one altogether and rely on guesswork.
Here’s the thing: knowing how to read a meat thermometer is one of the simplest kitchen skills you can learn, but it’s also one of the most misunderstood. People jam the probe in the wrong spot, read it too early, or don’t realize their dial thermometer needs calibrating. The result? You either pull meat off the grill too soon (risky) or too late (dry and disappointing).
This guide covers everything you need — how different thermometer types work, where to insert the probe, how to interpret the reading, and the small details that make the difference between a perfectly cooked piece of meat and a missed opportunity.
The Two Main Types of Meat Thermometers (And How Each One Works)
Before you can read a meat thermometer accurately, you need to understand what type you’re working with. They don’t all behave the same way.
Dial (Analog) Thermometers
These are the classic ones with a round face and a needle that swings to show temperature. You’ll see them sticking out of Thanksgiving turkeys in every movie. A dial thermometer uses a bimetallic strip inside the stem — as heat causes the metals to expand at different rates, the needle moves.
How to read it: Look at where the needle points on the numbered dial. The numbers usually go from around 120°F to 220°F (or the Celsius equivalent). Each small tick mark typically represents 2 or 5 degrees depending on the model.
One detail people overlook: the sensing area on a dial thermometer isn’t at the very tip. It’s along the lower portion of the stem — usually the bottom 2 to 2.5 inches. That means you need to insert the probe deep enough so that entire sensing area sits in the thickest part of the meat. If even part of that zone is outside the meat or touching bone, you’ll get a wrong reading.
Dial thermometers are also slower. They can take 15 to 30 seconds (sometimes longer) to stabilize. Don’t glance at it after five seconds and assume that’s your temperature.
Digital Thermometers
Digital thermometers display the temperature as a number on a screen. There are two common varieties:
- Instant-read thermometers — You insert the probe, get a reading in 2 to 5 seconds, and pull it out. These aren’t designed to stay in the meat during cooking.
- Leave-in probe thermometers — These have a probe connected by a wire (or wirelessly) to a display unit that sits outside the oven or grill. You insert the probe before cooking and monitor the temperature throughout.
How to read a digital thermometer: It’s straightforward — the number on the screen is your temperature. But there’s an important catch. An instant-read thermometer senses temperature at or very near the tip of the probe (usually the last half-inch). That’s a much smaller sensing zone than a dial thermometer, which means placement is even more critical. If the tip lands in a fat pocket or touches a bone, the reading won’t reflect the actual temperature of the meat.
Pro Tip: If you’re buying a thermometer and aren’t sure which type to get, an instant-read digital thermometer is the most versatile option for home cooks. It’s fast, accurate, and works for everything from grilled chicken to smoked brisket.
Where to Put the Meat Thermometer (This Is Where Most People Go Wrong)
Knowing how to read the numbers means nothing if the probe is in the wrong place. Where you insert the thermometer matters just as much as what the display says.
The golden rule: always aim for the thickest part of the meat, away from bone, fat, and gristle.
Here’s why. Bone conducts heat faster than muscle. Fat has a different thermal profile. Gristle won’t give you a meaningful reading. If your probe tip sits against any of these, you’ll get a number that doesn’t represent the true internal temperature of the meat.
Specific Placement by Cut
Whole chicken or turkey: Insert into the thickest part of the thigh, between the drumstick and the breast, without touching the thighbone. Some people also check the thickest part of the breast separately. The thigh typically takes longer to reach safe temperature than the breast, so that’s usually your controlling measurement. For turkey specifically, you want to hit 165°F in the thigh.
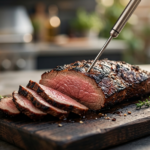
Steaks and chops: Insert the probe from the side, going horizontally into the thickest portion. Going in from the top can give misleading readings because you might be measuring the temperature closer to the surface rather than the center. For a thick-cut steak, push the probe tip to the approximate center. If you’re curious about the finer points of steak doneness, our steak doneness guide breaks down each level with temperatures.
Roasts (beef, pork): Go straight into the geometric center of the thickest section. On an irregularly shaped roast, that center might not be where you’d expect. A good approach: insert the probe slowly and watch the reading. As you push deeper, the temperature should drop. When it starts rising again, you’ve passed the center. Pull back slightly to where it was lowest — that’s your coldest point, and that’s your true reading.
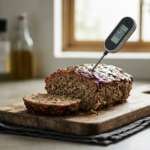
Ground meat (burgers, meatloaf): Insert from the side into the center. Ground meat doesn’t have the bone and fat pocket issues of whole cuts, but thickness variation matters. With burgers, the thinnest part will always be hotter than the center. Checking hamburger internal temperature is especially important because ground beef needs to reach 160°F for safety — there’s no rare option with ground meat.
Brisket: This is a unique case because brisket has two muscles (flat and point) with a fat layer between them. The flat is thinner and cooks differently than the point. For smoke-and-low-slow cooking, you’ll want to probe the thickest part of the flat. If you’re probing brisket for the first time, our guide on where to probe brisket goes deeper on exact placement.
How to Read the Temperature Correctly
You’ve got the thermometer in the right spot. Now what?
For Dial Thermometers
Wait. Seriously, just wait. Give it at least 20 seconds for the needle to stop moving. If you’re impatient and pull it at the 10-second mark, you might be reading a temperature that’s 10 to 15 degrees off.
Read the dial at eye level. Looking at it from an angle can cause parallax error — you might read 155°F when it’s actually at 160°F. This matters more than you’d think, especially with poultry where every degree near the safety threshold counts.
For Digital Thermometers
An instant-read thermometer will stabilize quickly, usually within 2 to 4 seconds for a good-quality model. Wait until the number stops changing. Some models display a little indicator (like a snowflake icon disappearing or the digits stopping their flicker) to tell you the reading has stabilized.
With a leave-in probe thermometer, the reading updates continuously. Watch the trend rather than fixating on a single number. If the temperature is climbing steadily, you know you’re on track. If it stalls (common with large cuts like brisket around 150–170°F — the infamous “stall”), that’s normal. If you want to know what temperature brisket is done, that’s a separate topic worth understanding for low-and-slow cooks.
Taking Multiple Readings
This is a meat thermometer tip that separates good cooks from great ones: don’t rely on a single reading. Check the temperature in two or three spots, especially on large or irregularly shaped cuts. A pork shoulder can easily be 200°F in one spot and 185°F in another. Your meat is only as done as its coldest point.
Safe Internal Temperatures You Should Know
Reading a meat thermometer is only useful if you know what numbers you’re looking for. Here are the USDA-recommended safe minimum internal temperatures for common meats:
| Meat | Safe Minimum Internal Temp |
|---|---|
| Chicken (whole, breasts, thighs) | 165°F (74°C) |
| Turkey | 165°F (74°C) |
| Ground beef, pork, lamb | 160°F (71°C) |
| Beef steaks and roasts (minimum) | 145°F (63°C) + 3 min rest |
| Pork chops and roasts | 145°F (63°C) + 3 min rest |
| Fish | 145°F (63°C) |
| Ham (fresh or raw) | 145°F (63°C) + 3 min rest |
A few things to keep in mind with this chart. The 145°F figure for beef and pork includes a 3-minute rest time. During that rest, carryover cooking continues to raise the internal temperature a few degrees, which helps eliminate pathogens.
For pork specifically, the USDA updated its recommendation years ago from 160°F down to 145°F. A lot of people still overcook pork because they’re working from the old number. If you’re making pork chops, checking the pork chop internal temp properly will be the difference between juicy and cardboard.
Carryover Cooking: Why You Should Pull Meat Off Early
This is one of the most practical things to understand about using a meat thermometer, and many resources gloss over it.
When you remove meat from the heat source — whether it’s a grill, oven, or smoker — the outside of the meat is significantly hotter than the center. That heat continues to move inward even after cooking stops. This is carryover cooking, and it can raise the internal temperature by 3 to 10°F depending on the size and thickness of the cut.
What does this mean in practice? If you want your steak to finish at 135°F (medium), pull it off the grill at around 130°F. If you’re roasting a chicken and want 165°F in the thigh, pulling it at 160–162°F and letting it rest will typically get you there.
Thicker, denser cuts have more carryover. A 15-pound brisket will coast more than a thin pork chop. A small chicken breast might only gain 2 or 3 degrees.
The mistake: waiting until the thermometer hits your target temperature before removing the meat from heat. By then, carryover will push it past where you wanted, and you’ll end up with meat that’s more done than intended.
Calibrating Your Thermometer
If your thermometer isn’t accurate, it doesn’t matter how carefully you place it. Calibration checks are easy and worth doing occasionally, especially with dial thermometers.
Ice water test: Fill a glass with ice, then add cold water. Let it sit for a minute, then insert your thermometer probe. It should read 32°F (0°C). If it’s off by more than a couple of degrees, you need to calibrate.
For dial thermometers, most have a small nut on the back of the dial face. Use pliers to turn it while the probe is in the ice water until the needle points to 32°F.
Digital thermometers can’t usually be adjusted the same way. If a digital thermometer consistently reads off, note the offset (e.g., “reads 3 degrees high”) and mentally adjust, or replace it.
Warning: A cheap thermometer that’s off by 10 degrees can mean the difference between safe and unsafe poultry. If you cook chicken regularly, this isn’t a minor issue.
Common Mistakes When Using a Meat Thermometer
Even people who own a thermometer sometimes get unreliable results. Here are the most frequent errors:
Checking too early and too often. Every time you open the oven or lift the grill lid to probe, you lose heat and extend cooking time. Plan your checks. For a large roast, checking once or twice near the estimated end of cooking time is usually enough. A leave-in probe thermometer solves this problem entirely.
Not inserting deep enough. With dial thermometers especially, a shallow insertion means the sensing area isn’t fully inside the meat. You’ll read a temperature somewhere between the meat’s interior and the ambient air. Always insert past the sensing zone.
Touching bone or the pan. The probe tip touching a bone reads higher than the meat itself. The tip touching a hot pan or grill grate reads dramatically higher. Either way, you’ll think the meat is done when it isn’t — or you’ll get a confusingly high number.
Ignoring the rest. Pulling meat and immediately cutting into it releases juices and stops carryover cooking. Rest your meat. Five minutes for a steak, 15 to 20 for a roast, 30+ for a brisket or whole turkey. The temperature will continue to climb during this window.
Using the wrong thermometer for the job. An instant-read thermometer isn’t meant to sit in the oven. A standard oven-safe leave-in thermometer won’t give you quick spot-checks at the grill. Match the tool to the task.
A Note on Smoking and Low-and-Slow Cooking
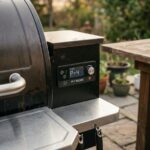
If you’re smoking meat on a pellet grill or charcoal smoker, reading a meat thermometer becomes even more important because cook times are long and unpredictable. A brisket might take 10 hours or 16 hours depending on size, shape, humidity, and the smoker’s behavior.
A leave-in probe thermometer with a remote display or Bluetooth/Wi-Fi connectivity is almost essential for this kind of cooking. You can’t keep opening the smoker to check — you’ll lose too much heat and smoke.
When smoking something like pork shoulder at 275°F, internal temperature tracking tells you when you’ve hit the stall, when to wrap, and when the meat is truly probe-tender. For pulled pork, the target is typically around 195–205°F. For brisket, similar. Hitting these ranges is nearly impossible to do by time alone — you need the thermometer.
If you’re deciding between smoker types, the choice between a pellet grill and a gas grill affects how you’ll monitor and manage temperature throughout the cook.
FAQ
Can I leave an instant-read thermometer in the meat while it cooks?
No. Instant-read thermometers are designed for quick spot checks. Leaving them in the oven or grill can damage the electronics and give inaccurate readings. If you want continuous monitoring, use a leave-in probe thermometer instead.
How do I know if my meat thermometer is accurate?
The easiest test is the ice water method. Submerge the probe in a glass of ice water and check if it reads 32°F (0°C). You can also test with boiling water, which should read 212°F (100°C) at sea level. If it’s off by more than 2 degrees, calibrate it or replace it.
Where do I put the thermometer in a thin piece of meat like a burger or a chicken breast?
Insert the probe from the side, horizontally, so the tip reaches the center of the thickest part. Going in from the top on thin cuts often means the probe passes through the meat entirely or sits too close to the cooking surface. Sideways insertion gives you a much more accurate center reading.
Does the color of the meat tell me if it’s done?
Not reliably. Pork can be slightly pink at 145°F and be perfectly safe. Chicken can look white and still be undercooked near the bone. Ground beef can turn brown before it hits 160°F. Color is a terrible indicator of doneness — a thermometer reading is the only trustworthy method.
My thermometer reading keeps jumping around. What’s wrong?
This usually means the probe tip is near bone, fat, or the edge of the meat rather than in solid muscle. It can also happen with cheap thermometers that have slow or unstable sensors. Try repositioning the probe deeper into the thickest part of the meat. If the problem persists, it might be time for a better thermometer.
One Last Thing
Learning how to read a meat thermometer isn’t complicated, but it does require paying attention to a few details most people skip — where you place the probe, how long you wait for the reading, and understanding that the number you see isn’t always the number you’ll finish at (because of carryover cooking).
If you take one thing from this guide, let it be this: always probe the thickest part, wait for the reading to stabilize, and pull the meat a few degrees before your target. Do that consistently, and you’ll cook better meat than most people ever manage. A $15 instant-read thermometer and a little know-how will improve your cooking more than almost any other kitchen upgrade.

3 thoughts on “How to Read a Meat Thermometer Correctly (And Avoid Common Mistakes)”
Comments are closed.