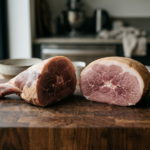
Smoked brisket tastes incredible on day one. But leftovers? That’s where most people run into trouble. The meat dries out, turns tough, or loses the smoky flavor you worked hours to build.
The good news: reheating brisket well isn’t complicated. You just need to understand one thing — moisture is everything. Every effective brisket reheat method revolves around keeping moisture locked in and bringing the temperature up gently.
The best way to reheat brisket depends on how much time you have, what equipment is available, and whether you’re warming up slices or a whole chunk. Below, you’ll find the methods worth knowing, along with the small details that make the real difference between dried-out leftovers and brisket that tastes almost as good as fresh off the smoker.
Why Brisket Dries Out When You Reheat It
Before jumping into methods, it helps to understand why reheating brisket is tricky in the first place.
Brisket is a collagen-heavy cut. During the initial low-and-slow cook, that collagen breaks down into gelatin, which is what makes the meat feel moist and tender. When you cool brisket down, that gelatin firms up and holds onto moisture pretty well. But when you reheat it — especially too fast or at too high a temperature — the meat fibers contract and squeeze out that moisture. The result is dry, chewy brisket.
This is why microwaving a brisket slice on high for two minutes produces such disappointing results. The heat is too aggressive. The moisture escapes before the gelatin can re-melt and redistribute.
So across all the methods below, you’ll notice a common theme: low heat, slow warming, and added moisture. That’s the formula.
If you still have your brisket unsliced, you’re already at an advantage. A whole piece retains moisture far better than individual slices during reheating. If you sliced it before storing, don’t worry — you just need to be a little more careful with the process.
One more detail that’s easy to overlook: how you stored the brisket matters. If you saved the drippings or au jus from the original cook, that’s liquid gold for reheating. Pour some over the meat before warming it up. If you didn’t save the juices, a splash of low-sodium beef broth works well as a substitute.
Oven Method — The Reliable Standard
This is the most popular and forgiving method for reheating leftover brisket, and it works well for both sliced and unsliced portions.
Here’s how to do it:
- Preheat your oven to 250°F (120°C).
- Place the brisket in an oven-safe dish or baking pan. If it’s sliced, arrange the pieces in a single overlapping layer.
- Add a few tablespoons of beef broth, au jus, or even just water to the bottom of the pan. You’re not submerging the brisket — just giving it a shallow bath of liquid.
- Cover the pan tightly with aluminum foil. This traps steam inside and prevents the surface from drying out.
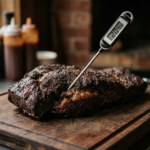
- Heat until the internal temperature reaches around 140–150°F. For slices, this usually takes 20–30 minutes. A larger unsliced piece can take 45–60 minutes or more.
- If you want to restore a bit of bark crispness, remove the foil for the last 5–10 minutes.
The oven method is forgiving because the low temperature gives you a wide margin of error. Even if you leave it in a few minutes too long, the foil and liquid protect the meat. It’s also the easiest approach when you’re reheating brisket for a group — you can warm up several pounds at once without much extra effort.
Pro Tip: A meat thermometer takes the guesswork out. You’re aiming for that 140–150°F internal temp. Going significantly above 160°F starts squeezing out moisture again. If you’re not sure how to read a meat thermometer, it’s worth learning — it helps with reheating just as much as it helps with cooking.
Smoker Method — Best for Flavor Restoration
If you smoked the brisket originally and want the closest thing to “just off the smoker” flavor, reheating it on the smoker makes a lot of sense. It takes longer, but it adds a layer of freshness to the bark and smoke flavor that no other method can match.
Set your smoker to 225°F. Place the brisket (ideally unsliced or in thick chunks) directly on the grate. You can place it in a foil pan with some liquid if you want extra moisture protection, or wrap it in butcher paper — butcher paper tends to perform better than parchment for this because it breathes slightly while still holding in steam.
Let it warm up until it hits 140–150°F internally. Depending on size, this can take anywhere from 45 minutes to over an hour.
This method works best when you have time and are already firing up the smoker for something else. It’s not the most practical option for a quick Tuesday night dinner, but for a weekend where you’re grilling anyway, it’s the way to go. If you’re curious about the best temperature to smoke brisket for the initial cook, that’s worth reviewing too — nailing the first cook makes reheating much easier.
Sous Vide Method — The Moisture King
If you have a sous vide setup, this is arguably the single best way to reheat brisket without drying it out. It’s nearly foolproof.
The concept is simple: you’re warming the brisket in a sealed bag, submerged in a precisely controlled water bath. No moisture can escape. The temperature never exceeds what you set. It’s almost impossible to overcook or dry out the meat this way.
Here’s the process:
- Vacuum-seal the brisket (with any saved juices if you have them). If you don’t have a vacuum sealer, a zip-lock bag with the air pressed out works in a pinch.
- Set your sous vide to 150°F (65°C).
- Submerge the bag and let it heat for 1–2 hours, depending on thickness. Even thinner slices benefit from at least 45 minutes to warm evenly.
- Remove, open the bag, and serve.
The only downside: the bark won’t be crispy. If that matters to you, a quick sear in a hot cast-iron skillet for 30–60 seconds per side after the sous vide bath restores some of that texture.
One detail worth mentioning — this method is especially good if you planned ahead and froze the brisket in portions. You can go from freezer to sous vide bath without thawing first. Just add an extra hour to the warming time.
Skillet Method — Quick and Practical for Slices
Sometimes you don’t have an hour. You’ve got a few slices of leftover brisket and you want them warm and edible in 10 minutes. The skillet method handles this well, as long as you don’t rush it.
Use a skillet or cast-iron pan over medium-low heat. Add a thin layer of beef broth to the pan — maybe two or three tablespoons. Place the slices in, cover with a lid, and let them steam-warm for about 5–7 minutes. Flip once halfway through.
The lid is the key here. Without it, the moisture evaporates and you’re basically pan-frying already-cooked brisket, which dries it out fast.
This isn’t the ideal method for large quantities or thick pieces, but for a quick brisket sandwich or a plate of slices alongside some sides, it gets the job done. A similar approach works well when you’re reheating ribs in a hurry.
Microwave Method — Last Resort, But Doable
Let’s be honest. The microwave is rarely the best option for reheating brisket. But sometimes it’s what you’ve got — you’re at work, you’re short on time, or you just want a quick bite.
If you’re going to use the microwave, do it this way to minimize damage:
- Place slices on a microwave-safe plate in a single layer.
- Drizzle a tablespoon or two of broth or water over the meat.
- Cover with a damp paper towel or microwave-safe lid.
- Use 50% power and heat in 30-second intervals, checking after each one.
At full power, the microwave heats unevenly and aggressively — some spots will overcook while others stay cold. Reducing the power and going in short bursts gives the heat time to distribute more evenly.
Will it taste as good as the oven or sous vide method? No. But it’ll be significantly better than zapping it on high for two minutes and ending up with brisket jerky.
Storing Brisket the Right Way Sets Up Better Reheating
How you store brisket before reheating has a huge impact on the final result. A few things that make a real difference:
Save the juices. If your brisket produced pan drippings during the cook, save them in a separate container. When you reheat, those drippings add back the exact flavor and moisture the meat originally had. No broth substitute matches this.
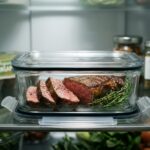
Store unsliced if possible. A whole chunk of brisket retains moisture better in the fridge than pre-sliced pieces. Slice only what you plan to eat, and store the rest whole.
Wrap tightly. Whether you’re using plastic wrap, foil, or vacuum-seal bags, the goal is minimizing air contact. Air exposure is what causes that dry, grayish surface on stored brisket.
Refrigerate within two hours of cooking. This isn’t just a food safety guideline — it also preserves quality. Brisket that sits at room temperature too long loses moisture through evaporation and enters the bacterial danger zone.
Freeze for longer storage. Brisket keeps well in the fridge for 3–4 days. Beyond that, freeze it. Properly wrapped and frozen brisket stays good for 2–3 months. Vacuum-sealed brisket can last even longer without freezer burn.
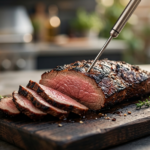
If you’re the type who plans ahead, you might also find it helpful to know how to slice brisket properly — cutting against the grain before storing individual portions makes reheating and serving much easier later.
Sliced vs. Whole: Which Reheats Better?
This is a question that comes up often, and the answer is straightforward.
Whole (unsliced) brisket reheats better. The intact muscle holds onto moisture more effectively, and there’s less surface area exposed to heat. You can bring it up to temperature slowly in the oven or smoker, then slice just before serving.
Sliced brisket is more convenient — it warms faster and requires no cutting at serving time. But those thin slices dry out more quickly, which is why added liquid and tight covering are non-negotiable when reheating slices.
If you froze pre-sliced brisket, let it thaw in the fridge overnight rather than at room temperature. Slow thawing in the fridge loses less moisture than a rapid room-temperature thaw.
What About Reheating Brisket from Frozen?
You don’t always need to thaw first, depending on your method.
- Oven: You can go straight from freezer to oven. Add extra liquid, cover tightly, and expect to add 50–75% more time to the reheating process. Keep the temperature at 250°F.
- Sous vide: Works perfectly from frozen. Just add an extra hour to the water bath.
- Smoker: Best to thaw overnight in the fridge first. Putting frozen brisket on a smoker can lead to uneven heating — the outside may overdry before the center warms through.
- Skillet or microwave: Thaw first. These methods rely on quick, direct heat, and frozen meat won’t reheat evenly.
Quick Comparison of Brisket Reheat Methods
| Method | Time | Best For | Moisture Retention | Bark Quality |
|---|---|---|---|---|
| Oven (250°F) | 20–60 min | Sliced or whole, groups | Very good | Good (if uncovered last 5 min) |
| Smoker (225°F) | 45–90 min | Whole pieces, flavor focus | Very good | Excellent |
| Sous vide (150°F) | 1–2 hours | Any portion, best moisture | Excellent | None (needs sear after) |
| Skillet | 5–10 min | A few slices, quick meals | Good if covered | Moderate |
| Microwave | 2–5 min | Emergencies, small portions | Fair | None |
Common Mistakes When Reheating Brisket
A few patterns show up again and again:
Using too much heat. Whether it’s a 400°F oven or a microwave on full power, high heat is the fastest way to dry out brisket. Low and slow applies to reheating just as much as cooking.
Skipping added liquid. Even a tablespoon of broth or saved drippings makes a noticeable difference. The liquid creates steam under the foil or lid, and that steam keeps the meat surface from drying.
Not covering the meat. Uncovered brisket in an oven is basically roasting again. The surface dries out first, and by the time the center is warm, the outer layer is tough.
Reheating repeatedly. Every time you warm brisket up and cool it down, you lose moisture. Reheat only what you plan to eat in one sitting. This also matters from a food safety standpoint.
Ignoring the thermometer. “Warm enough” is vague. 140–150°F internal is the sweet spot. Above 160°F, you start losing the battle against dryness.
FAQ
Can you reheat brisket more than once?
You can, but you shouldn’t make a habit of it. Each reheat cycle drives out moisture and degrades texture. Repeated heating and cooling also increases food safety risk. The better approach is to portion your brisket before storing and only reheat what you’ll eat.
What liquid should I add when reheating brisket?
The best option is saved drippings or au jus from the original cook. If you didn’t save those, low-sodium beef broth is the next best thing. In a pinch, plain water works — it creates steam, which is the primary goal. Avoid anything strongly flavored (like wine or vinegar) unless you want to change the taste profile.
How do I get crispy bark back after reheating?
Most reheating methods soften the bark because of the steam environment. To restore some crunch, unwrap the brisket for the last 5–10 minutes in the oven, or give it a quick sear in a very hot cast-iron skillet. The smoker method tends to preserve bark the best overall.
Is it safe to reheat brisket that’s been in the fridge for 5 days?
Cooked brisket stored properly in the fridge is generally safe for 3–4 days. At 5 days, you’re pushing it. If it smells off, has a slimy texture, or looks discolored, discard it. When in doubt, throw it out — no leftover brisket is worth a foodborne illness.
Can I reheat brisket in an air fryer?
You can, but be cautious. Air fryers circulate hot, dry air, which tends to dry out brisket surfaces quickly. If you try it, keep the temperature at 250°F, wrap the brisket in foil with some liquid, and check frequently. Honestly, the oven does the same job with less risk.
Make the Most of Your Leftover Brisket
Good brisket takes hours to cook. It deserves more than a careless reheat. The method you choose matters less than following the basics: low temperature, added moisture, and a tight cover. Get those three things right, and your leftover brisket will be genuinely enjoyable — not just “good enough.”
If you’re still in the planning stages and haven’t cooked the brisket yet, understanding what temperature brisket is done and when to wrap it gives you a better starting point that makes everything — including reheating — easier down the line.